Healthy communication is the backbone of establishing and growing a business. Business owners are well versed in the importance of building a bridge to consistently maintain a positive flow of communication. It takes more than upgrading the content on your site. You need to have good relationships with clients by delivering conversion generating and customized intelligence.
If you’re looking for an email marketing service that helps you design campaigns, set up a list of subscribers, and much more, Mailchimp is the perfect solution. It is also highly compatible with WordPress.
Why is building an Email list important?
An email list enables you to have absolute control over your direct communication. You have complete say in the appearance of your content, unlike on Twitter or Instagram that can alter your content to fit their guidelines. It also helps keep in contact with an individual who is not regularly active on social media. In the absence of social media users, you can still keep them informed through a newsletter or email list.
Why use Mailchimp for WordPress sites?
You might be wondering why Mailchimp is the preferred email marketing service for WordPress users over several other options. Well, here’s why.
Mailchimp offers various features like A/B testing, segmentation, automation, and advance analytics that pave the way for successful email campaigns. A user-friendly interface helps you draft attractive emails for updating your subscribers. 24/7 customer support is one of the best features of Mailchimp.
Using a plugin to connect your WordPress site with Mailchimp
You need to invest time in connecting your Mailchimp with WordPress. Here’s what you need to do.
Step 1: Register yourself by signing up for Mailchimp
Fill in the basic information and then confirm your account through the email address you have specified.
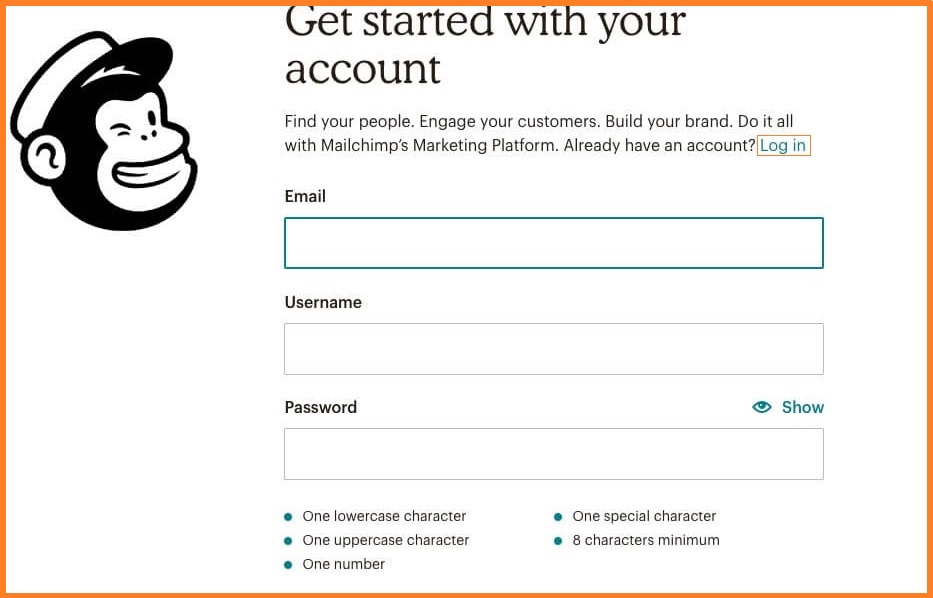
After your account is active, you need to fill in some small forms. It will aid Mailchimp in establishing your account.

Begin with putting in some of your business’ optional information:
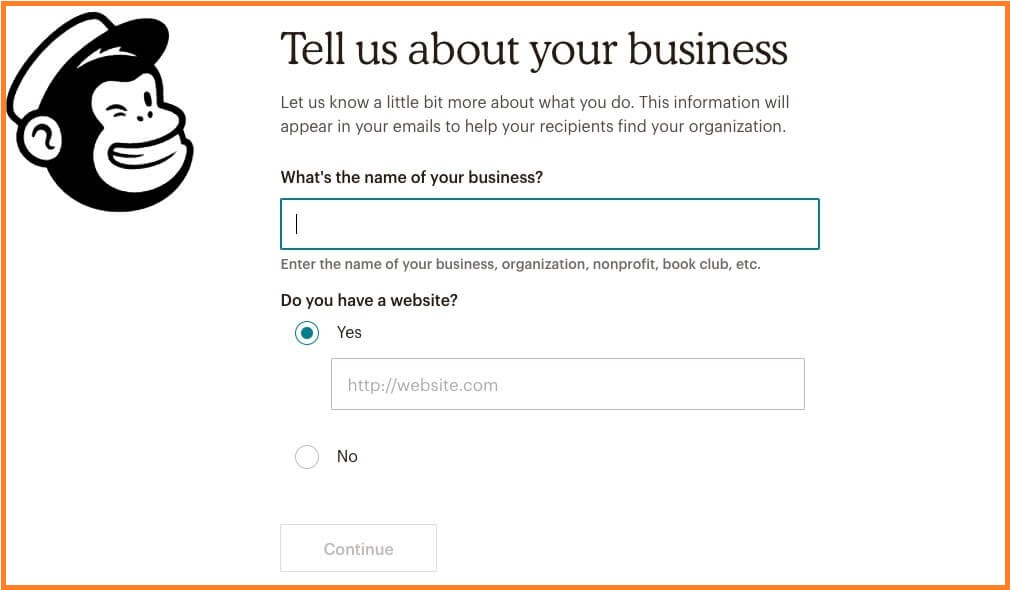
You need to pick a Mailchimp plan from the array of options offered to you, along with an option for a free plan.
Select Complete when you’re finished. You will be presented with choices to connect Mailchimp to your social media so that your campaigns can be shared to these platforms uninterrupted.
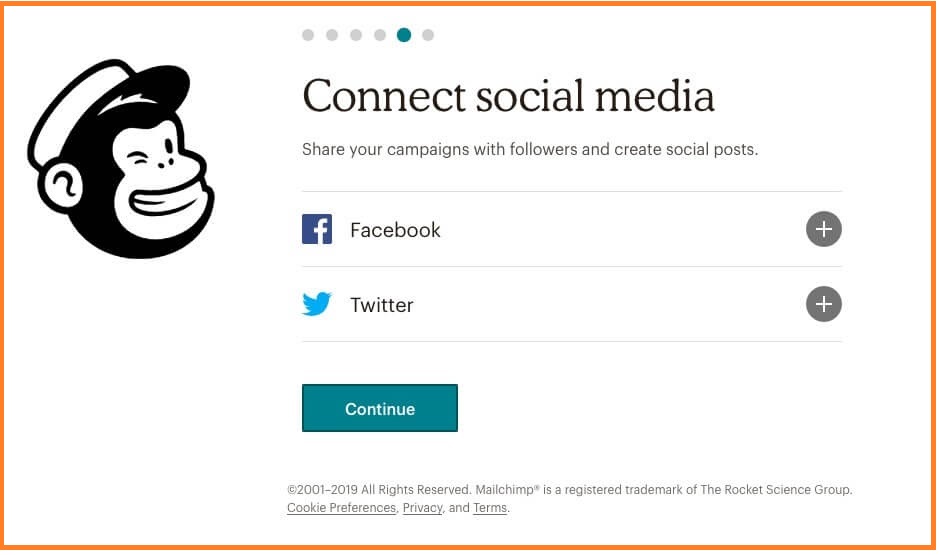
You can finalize this step or leave it for now. Regardless of what you choose, click on Continue to finalize the setup process for your account.
Step 2: Make an Email list
With your Mailchimp account up and running, you can focus on making your email list. While creating your account if you chose not to select a list that already existed, you can begin by uploading your contact list information through a file using the Import Your Contact option.

You have the alternative of manually putting together a list. To do that choose Add a contact and put in by hand every individual entry’s details.
Step 3: Install the Mailchimp WordPress Plugin
Using Mailchimp is possible without added tools, but you can also streamline the process by introducing Mailchimp for WordPress plugin. When you have activated the plugin after installation, go to your WordPress dashboard and click on Mailchimp Settings. With the help of an API key, you can join your website to your Mailchimp account to gain access to the forms and lists on your site.
Step 4: Find and Generate an API Key
In short, your site is connected to your service, for example, Mailchimp, by an API key. Your API key will be in Mailchimp within WordPress. Select Get your API Key.

Following that, you will be taken to a Mailchimp website. Click on Create Key, then copy the provided code. Come back to your WordPress website, paste the copied code into the blank API Key field, and click on Save Changes.
Your dashboard gives you to access any integrations, previously made forms, and all of your lists. You can also make new forms simply by accessing Mailchimp for WordPress and then Form.
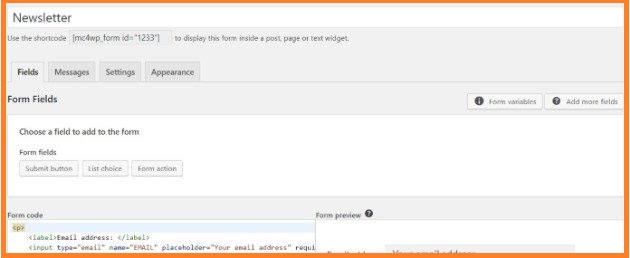
When these are generated, you can use the shortcode provided to put in forms to your widgets, pages, and posts.
Step 5: Add Mailchimp Forms to Your WordPress Site
Adding and creating signup forms is an easy task when your Mailchimp plugin has been already installed on your website. Your Mailchimp website allows you to do this manually by implementing Steps 1 and 2, as given above.
Adding a Popup Signup
Mailchimp helps you to create various kinds of forms. For example, if you want to enhance your website with a popup form, you can go to Lists, then Signup forms, followed by Subscriber popup inside Mailchimp.
You can select a design to customize your popup. You have display and formatting options to choose from. Selecting the fields you prefer to include, like ‘email address’ and ‘name’, you can insert background images and several other contents according to your taste. Your customized popup can be previewed while you’re working on it, so you can make changes on the go.
Ultimately, select Generate Code situated at the base of your pop-up form editor, select the code to copy it.
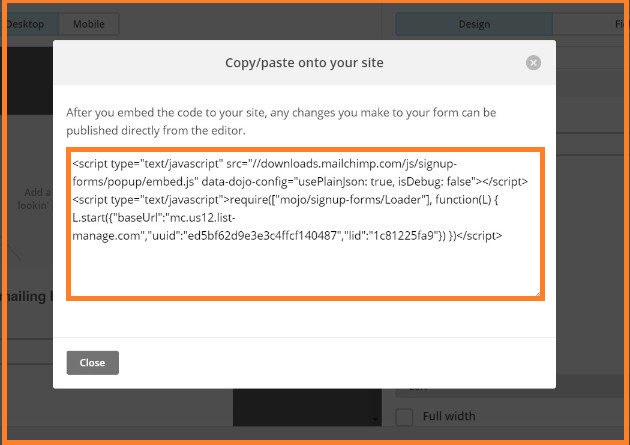
Visit your WordPress dashboard, where you can find your website’s HTML that you’ll need to add the code to. It is better to do it by applying a child theme. This saves your changes even when your theme is changed.
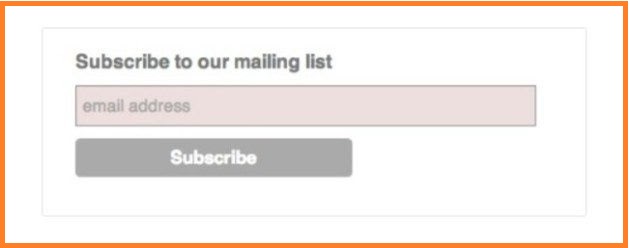
Adding an Inline Signup
An inline signup form helps you gather subscriber emails while enabling you to have a smooth User Experience (UX). Start with going to Lists, then Signup forms, followed by Embedded forms inside Mailchimp.
You are offered four amazing design options to make your inline signup form. These include Horizontal, Classic, Super Slim, and Naked. If you are looking for a theme that takes less space, Horizontal is the best pick for you. You can select the theme most compatible with your needs.
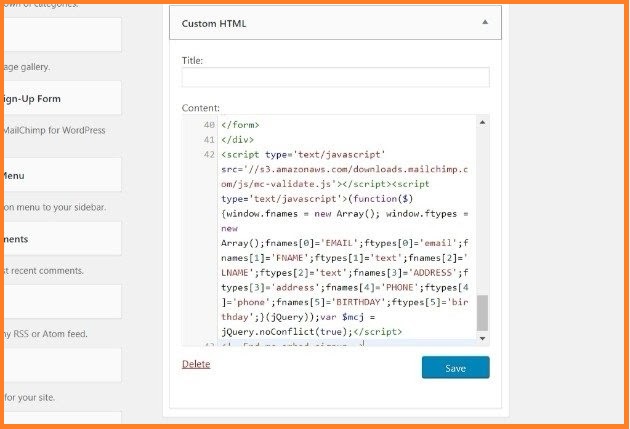
When you have customized the form, select Generate Code. Copy it, then come to WordPress again, and go to an acceptable page or post. Select Custom HTML block within the Block Editor, and paste it in your code.

- Adding a Sidebar Signup
Like an inline form, to put in a sidebar signup form, begin with going to Lists, then Sign up forms, followed by Embedded forms inside Mailchimp. Pick the design that best appeals to you. Super slim as well as Naked are recommended options for your sidebar. You can customize your form, and then copy the code on the base of your page once you are done.
Based on the theme you choose, you can use the WordPress Customizer to insert this code straight into your sidebar. On the other hand, you can choose to go to Appearance, then select Widgets in WordPress. You’ll be able to see the Custom HTML widget option. Select that and take it to the Sidebar. Fill the Content field with the HTML code by pasting it. Voila! Your site should be displayed by the form.
Styling Mailchimp Signup Forms
Your sign-up form will have the style sheet of your website while allowing you to customize each sign-up form’s style. This leads to it needing more alterations as time goes on. You can accomplish this in two ways. Coding the changes in manually or utilizing the Mailchimp for WordPress plugin.
The second option allows you to create and include new signup forms. The plugin’s free version lets you make just a single plugin. The premium add-ons on the other hand allow you to make several forms.
To choose form styles, choose Mailchimp for WordPress and then Form in it. You have the choice to alter the form’s appearance, content, and fields.
Marketing Your WordPress Site With Mailchimp
WordPress website offers you easy ways to add Mailchimp signup forms to it that help you garner a following. Moreover, you can automatically send newsletters to your readers using Mailchimp. Thus keeping in touch with your readers without going through any trouble.
Setting Up an Automatic Newsletter With Mailchimp
In case you are looking to email your subscribers when you update anything on your site, an automatic newsletter is the way to go. Everyone on your email list will receive the details of your update.

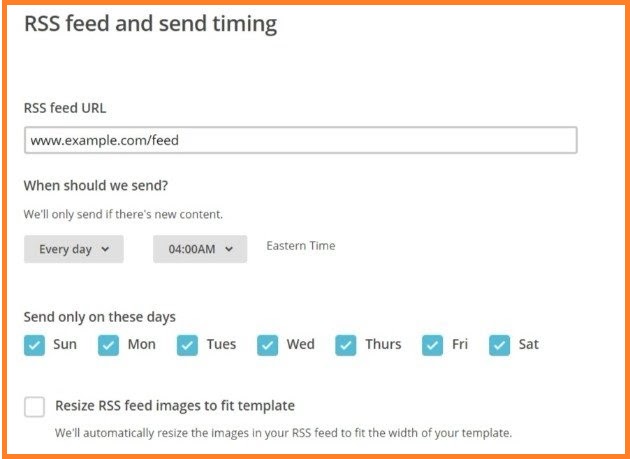
Get the URL of your website’s RSS feed, then proceed to Campaigns and then create campaigns. Follow that with Create an Email and then Automated in Mailchimp. Click on Share blog posts, choose a name for your campaign and then select Begin. Next, put in your RSS feed URL, decide on a sending time and then select other options according to your needs.
Choose your Recipients, and employ Setup changes that you might deem necessary. In the end, pick your Design and Template. When you’re finished, select Confirm and you’re good to go.
Grow Your Business on WP Engine
WP Engine provides a flexible platform for eCommerce store owners, marketers as well as bloggers. You can make a digital experience that includes a customer support team of experts that works 24/7 as well as all types of marketing.
- Summary
Building an Email list is one of the most important elements of growing your business. Mailchimp offers various features that help email campaigns succeed. Plus you can send eye-catching emails through an interface that is designed to be user-friendly to update your subscribers. Mailchimp has an army of experts ready to help your every need 24/7. This makes it the perfect combination with WordPress to keep you connected with all of your subscribers and help your business flourish.
Are you looking for a WordPress hosting site? Check out our managed WordPress hosting plans!